
Coxinha (Brazilian Chicken Croquettes Recipe)
Equipment
- 1 stovetop
- 4 bowls
- 2 Pans
- 1 Stand mixer
- 1 Rolling pin
- 1 Cookie cutter 3¼-inch round
- 1 baking sheet
- 1 frying machine
Ingredients
For the Coxinha Filling
- 2 tablespoons olive oil or a mild vegetable oil
- ½ cup yellow or white onion finely minced
- 2 garlic cloves finely minced
- 3 cups cooked chicken finely shredded (you can use skinless baked chicken breast, or rotisserie chicken
- Salt to taste
- Black pepper to taste
- 1 pinch of red pepper flakes optional and only if you enjoy the heat
- 3 tablespoons mayonnaise or if available, Catupiry cheese or Brazilian cheese spread - also called requeijão. Room temperature cream cheese is also a good substitute
- 3 tablespoons minced green onions or chives
For the Coxinha Dough
- 3⅓ cups chicken broth liquid
- A pinch of salt enough to taste
- ¼ teaspoon annatto or turmeric, optional
- 2 teaspoons olive oil
- 3 cups all-purpose flour sifted
Dredging
- 2 cups all-purpose flour
- 8 large egg whites divided
- 2-3 cups breadcrumbs divided
For Frying
- Enough vegetable oil to fully immerse the coxinhas for deep frying Canola oil is a great option because it has a high smoking point and a mild flavor
Instructions
Prepare the filling
- Heat a large skillet over medium heat, add the oil and then cook the onion, stirring now and then, until soft and translucent (about 2-3minutes). Add the garlic and cook for about 1 minute.
- In a large bowl, place the finely shredded chicken and stir in the cooked onion and garlic mixture, salt, pepper, red pepper flakes(optional), the mayonnaise or Catupiry cheese, and green onions or chives. Set aside! NOTE: If desired, the coxinha filling can be prepared 1 or 2 days ahead and refrigerated in an airtight plastic container.
Prepare the coxinha dough
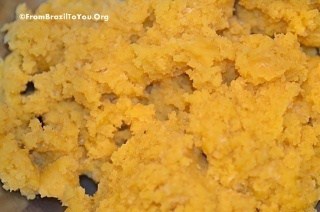
- In a large, non-stick saucepan, place the chicken broth (liquid), salt, annatto or turmeric (optional), and olive oil, and bring to a simmer over medium-low heat. When the stock is hot, add the sifted flour all at once while stirring very well. It will get more and more difficult to stir but continue to stir vigorously for about 1 minute or so until obtaining a uniformly lumpy dough.
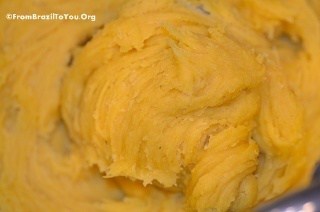
- Remove from the heat and transfer the dough to an electric mixer fitted with a hook attachment. Knead the dough at speed "2" for about 5 minutes or until it becomes soft and smooth (NOTE: If you don't have a mixer with a hook attachment, let the dough cool enough to handle and knead by hand very well).
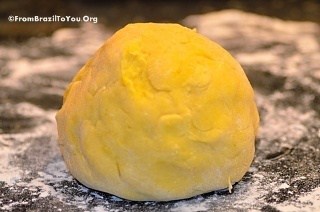
- Scrape the dough from the mixing bowl onto a well-floured surface with a dough scraper or spatula, and knead the ball of dough a little bit more by hand. Shape the savory dough into a flat disk and let rest for 5 to 8 minutes at room temperature.
- Using a rolling pin, roll out the dough onto a well-floured surface until it is about ¼ to ⅛-inch thick. Using a 3¼-inch round cookie cutter, cut out disks of dough and place them on a baking sheet lined with parchment paper (a metal spatula can be useful to help pry the disks from the rolling surface).

- Aggregate the dough leftovers, re-roll, and cut out more disks. With the ⅛-inch thick dough, I was able to cut about 34 disks.
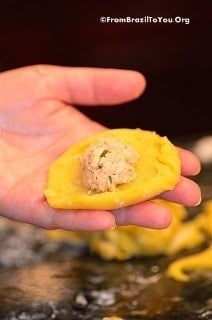
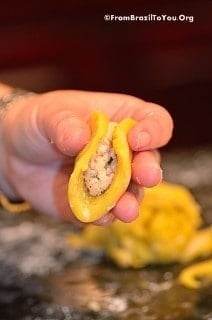
- Scoop about 1 tablespoon of the chicken mixture onto the center of each disk.
Shape the coxinha dough and filling into a drumstick shape
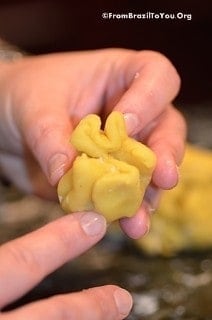
- Lightly oil your hands and shape the filled disks into drumsticks. First, fold the dough up and around the filling to form a U-shape like a taco.
- Next, bring up the dough along the two open sides to enclose the dough in a beggar's purse shape.
- Now form the neck of the coxinha between your encircled index finger and thumb, and gently press the filling down into the center as you close.
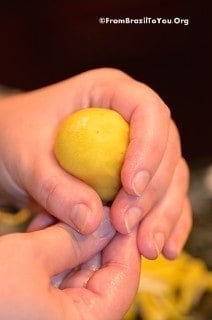
- Pinch and seal the edges. Pull the dough at the top out slightly so that it resembles a drumstick without the bone (that is, like a pear or tear drop shape).

- Use a moist towel to clean your fingers off each time they touch the filling. Make sure the dough has no cracks; if it does crack, wet your fingers in water and pinch the dough together. Flatten the rounded bottom of the coxinhas very minimally with the palm of your hand (just enough that they will be able to rest upright), and place shaped coxinhas on a baking sheet lined with parchment paper.

Dredge coxinhas
- Prepare 3 separate bowls for the all-purpose flour, half of the egg whites(i.e. 4 egg whites mixed with 1 teaspoon of water), and half of the breadcrumbs (i.e. about 1-½ cups of breadcrumbs).

- Pass the fritters through each bowl (flour, egg whites, and then breadcrumbs), shaking off any excess. The egg whites and breadcrumbs are divided for use in half-quantities because eventually, the bowl of whites will accumulate excess flour and the crumbs will accumulate excess whites. Both will need to be replaced to maintain an effective coating of the coxinhas as they are dredged.
Fry coxinhas:
- Pour enough vegetable oil into a frying machine or heavy-bottomed pot. Heat to 350 degrees F (180 degrees C). If you don't have a thermometer to measure the temperature, dip a small piece of the dough into the heated oil. If you hear a sizzling sound, the oil is ready.
- Fry the fritters in batches. Please, do not place too many coxinhas or chicken croquettes in at the same time because this will lower the temperature, making the fritters oily. Make sure to turn all sides while frying the fritters so that they will brown evenly.
- Transfer each coxinha to a baking sheet lined with a double sheet of paper towels to absorb any excess oil. To serve coxinhas warm, keep the finished batches in a warm oven until serving.
- Serve them by themselves or with a side of ketchup, lime wedges, rosé sauce, or chimichurri sauce.
Recipe Notes
Nutrition
** Nutrition labels on easyanddelish.com are for educational purposes only. This info is provided as a courtesy and is only an estimate, since the nutrition content of recipes can vary based on ingredient brand or source, portion sizes, recipe changes/variations, and other factors. We suggest making your own calculations using your preferred calculator, based on which ingredients you use, or consulting with a registered dietitian to determine nutritional values more precisely.
Please note that health-focused and diet information provided on easyanddelish.com is for educational purposes and does not constitute medical advice, nor is it intended to diagnose, treat, cure, or prevent disease. Consult with your doctor or other qualified health professional prior to initiating any significant change in your diet or exercise regimen, or for any other issue necessitating medical advice.