
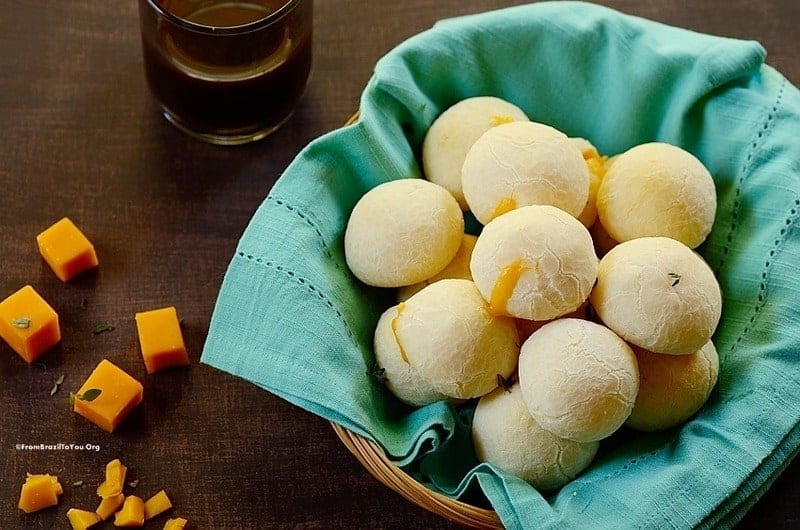
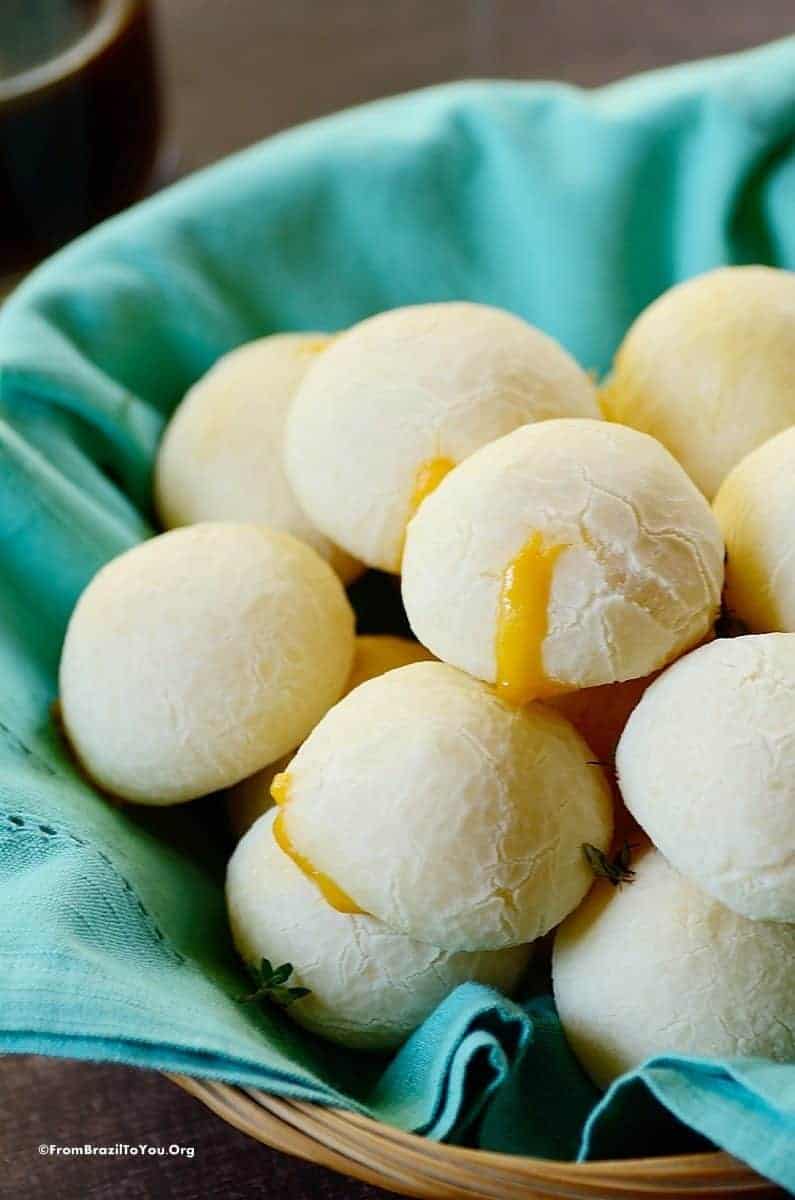
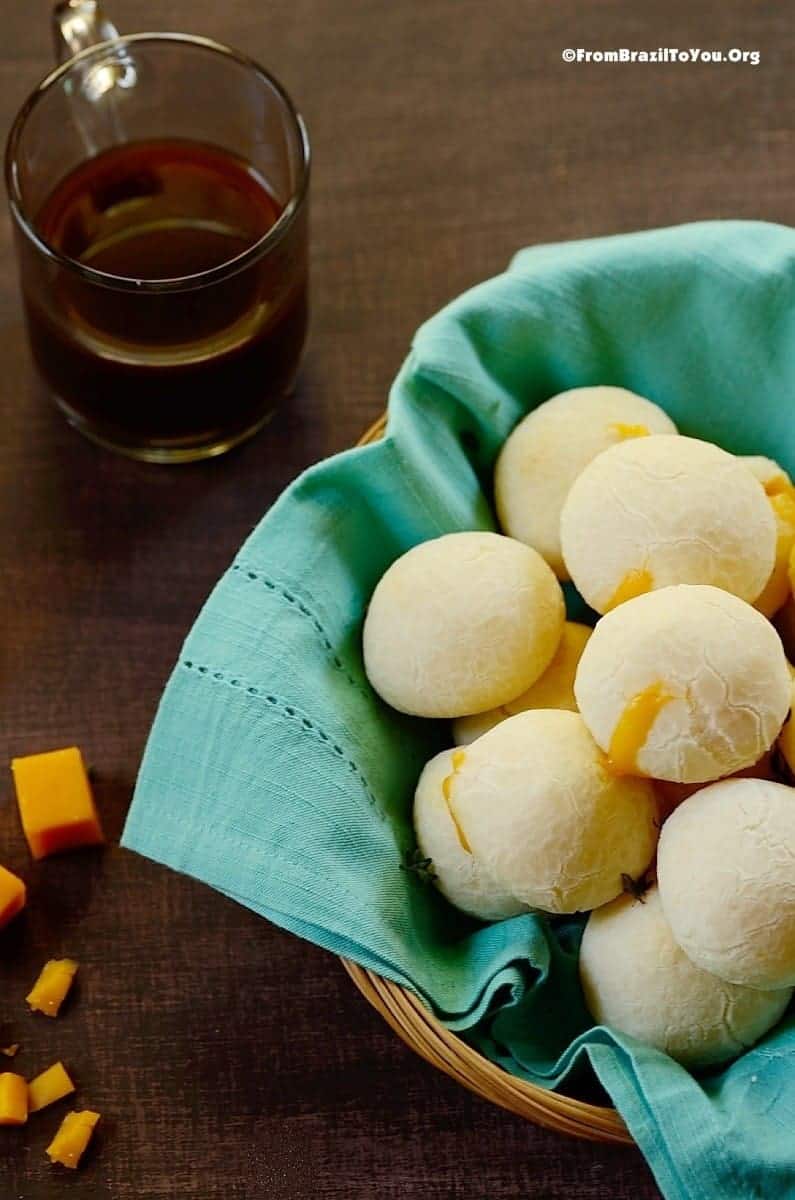
Cheese rolls are filled with a gooey cheddar filling, gluten-free, and can be served for breakfast, as a snack, or as party bites. It is like biting into pockets of melting cheese. So yummy!
As my fond memories of Brazil grow, so does my appetite for all Brazilian snacks and treats.
Brazilian cheese bread happens to be a real favorite of mine. The last time that I passed through Rio, I had some of the rolls with a cheese-filled center -- as well as other types of fillings.
As nostalgia was calling me homeward through food, I found myself preparing these naturally gluten-free cheese rolls (inspired by pão de queijo recheado com cheddar) --which pairs so great with coffee.
How about some baked goodies?
Cheese rolls recipe
This recipe is inspired by the famous Brazilian pão de queijo! Made from basic ingredients such as milk, cheese, vegetable oil, salt, eggs...
... and tapioca flour...
... this small baked good is easy and quick to prepare and delivers flavor with every single bite. The best part?
You don't have to be a great cook to come away like a hero.
Mixing the ingredients, cubing the cheese to fill small portions of dough, and then baking is ALL that you have to do. Pure enjoyment will fill both your mouth and soul!
What are Cheese Rolls?
In the Brazilian state of Minas Gerais, pão de queijo has been around since the eighteenth century, but its popularity spread to other regions of the country after the 1950s.
I would say that it is one of the most popular snacks in my home country. It is relatively inexpensive, and often sold on the streets, in snack bars, cafes, airports, bakeries, Brazilian steakhouses, and supermarkets.
And that's not all!
These Cheddar-filled cheese rolls make a great snack, breakfast, and small party bites. Is there a televised sports event coming up?
Surprise your crowd with these comforting bites and you'll score major points.
But if you thought all the commotion about pao de queijo is just limited to Brazil, you'd be dead wrong.
Pão de queijo is beloved in several other South American countries and even in Japan, where it is usually made with rice flour instead of tapioca flour.
It is also becoming more and more popular in the USA now through the influence of Brazilian steakhouses (churrascarias). And this is one of those recipes that my American friends have most inquired about.
But you know what? You won't find them filled with cheese at any churrascaria.

Believe me, if you enjoy the ones served at Brazilian steakhouses here in the US, you will be totally crazy about our cheese rolls.
After all, they contain the best of two countries: American cheddar on the inside and an exquisite Brazilian dough on the outside. 😉

So grab your cup of coffee and enjoy our finger-licking cheese rolls.
How to make cheese rolls
-
Line a large baking sheet with parchment paper. Preheat the oven to 350° F (180° C).
-
Place the tapioca flour in a large bowl and set aside.
-
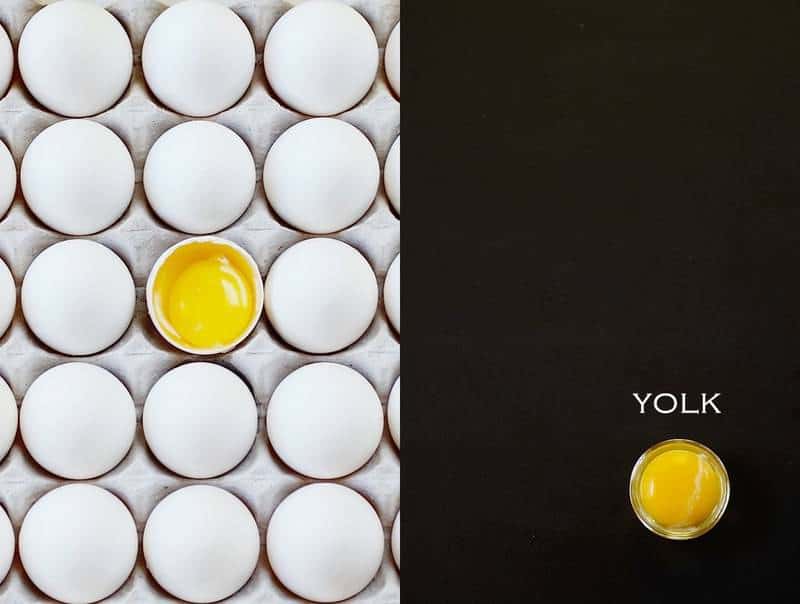
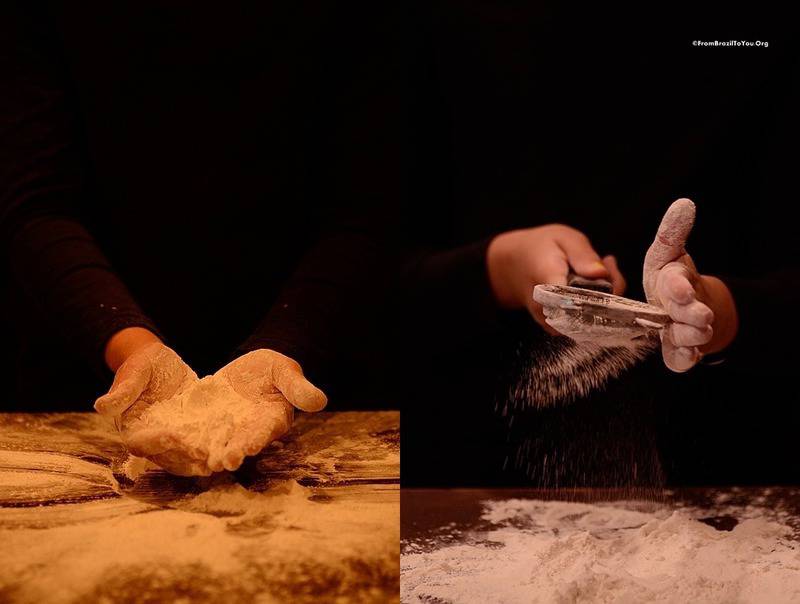
In a small saucepan, mix the milk, oil, and salt together and bring to a boil. Pour the hot liquid mixture into the reserved bowl of flour, stirring well with a wooden spoon. Mix in the egg, and then add the crumbled queso fresco and grated Parmesan. Sprinkle the thyme if desired. Knead the dough for about 2-3 minutes or until homogeneous.
-
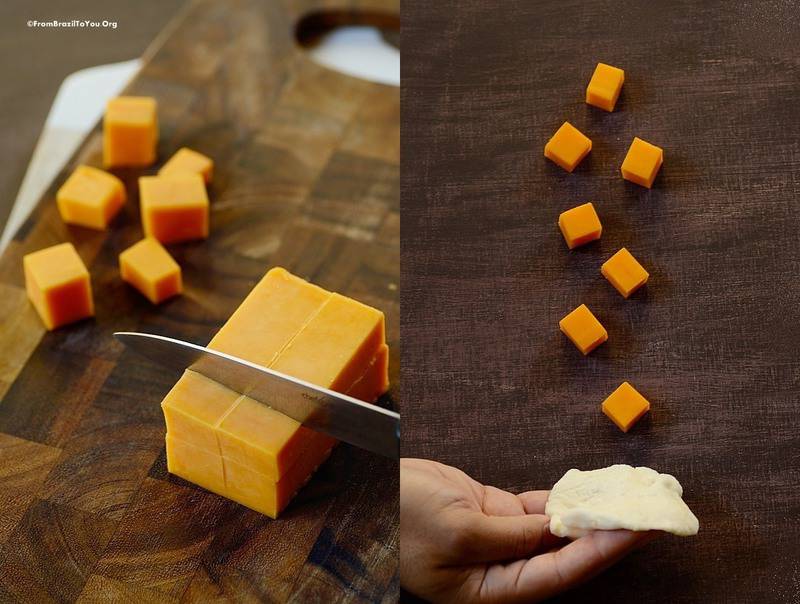
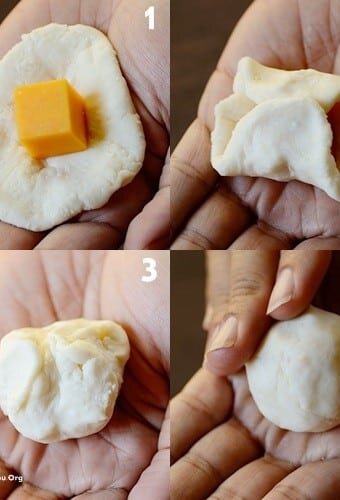
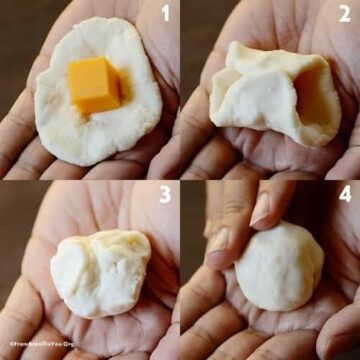
Lightly grease your hands with vegetable oil. Using a tablespoon as measurement, make balls of dough and open an indentation in the center to fill in with a cube of cheddar. Close the dough around the cheese cube, seal tightly, and shape it into a round ball, making sure there aren't any gaps where the cheese is exposed. SEE PICS. 1-4

-
Place them on the lined baking sheet and bake for 15 to 18 minutes or until they begin to lightly brown. Serve while warm accompanied by coffee, guaraná soda, caipirinha, or other beverage of your choice.
Can I use another type of cheese?
Yes! In fact, you can use any cheese that melts well to fill these baked goodies.
Storage
Freeze unbaked cheese rolls for up to 2 months in a freezer bag. Then bake and enjoy! They are an easy freezer recipe!
Or store baked leftovers in an airtight container in the fridge for up to one day.
Make sure to microwave for up to 10-15 seconds and eat right away; otherwise, they will become hard and chewy. They are best eaten fresh!
Other bread recipes
- Pumpkin bread
- No yeast bread
- Cauliflower bread
- Eggless bread
- Moist Banana Bread Recipe
- Garlic Rolls
- Oat Rolls (with Honey Butter)
- Bacon and Cheese Brazilian Hot Pockets
PIN & ENJOY!

Cheese Rolls (Gluten-Free)
Equipment
- oven
- baking sheet
- bowl
Ingredients
- 2 cups tapioca flour 250 g
- ½ cup whole milk 120 ml
- ¼ cup plus 1 tablespoon vegetable oil use extra to grease hands
- ½ teaspoon salt
- 1 large egg at room temperature
- 3.5 oz queso fresco crumbled, about 100 g
- 2 tablespoons grated Parmesan cheese
- ½ teaspoon dried thyme optional
- 15 cubes medium or sharp Cheddar cheese for the filling ⅓ to ½-inch
Instructions
- Line a large baking sheet with parchment paper. Preheat the oven to 350° F (180° C).
- Place the tapioca flour in a large bowl and set aside.
- In a small saucepan, mix the milk, oil, and salt together and bring to a boil. Pour the hot liquid mixture into the reserved bowl of flour, stirring well with a wooden spoon. Let it cool just enough to handle it using your hands.
- Mix in the egg, and then add the crumbled queso fresco and grated Parmesan. Sprinkle the thyme if desired. Knead the dough for about 2-3 minutes or until homogeneous. If needed, add more tapioca flour, spoonful by spoonful, until the dough does NOT stick in your hands anymore!
- Lightly grease your hands with vegetable oil. Using a tablespoon as measurement, make balls of dough and open an indentation in the center to fill in with a cube of cheddar.

- Close the dough around the cheese cube, seal tightly, and shape it into a round ball, making sure there aren't any gaps where the cheese is exposed.
- Place the rolls on the lined baking sheet and bake for 15 to 18 minutes or until they begin to lightly brown. Serve while warm accompanied by coffee, guaraná soda, caipirinha, or other beverage of your choice.
Recipe Video

Recipe Notes
Nutrition
** Nutrition labels on easyanddelish.com are for educational purposes only. This info is provided as a courtesy and is only an estimate, since the nutrition content of recipes can vary based on ingredient brand or source, portion sizes, recipe changes/variations, and other factors. We suggest making your own calculations using your preferred calculator, based on which ingredients you use, or consulting with a registered dietitian to determine nutritional values more precisely.
Please note that health-focused and diet information provided on easyanddelish.com is for educational purposes and does not constitute medical advice, nor is it intended to diagnose, treat, cure, or prevent disease. Consult with your doctor or other qualified health professional prior to initiating any significant change in your diet or exercise regimen, or for any other issue necessitating medical advice.
Did you make this recipe?
Comment and rate the recipe. Also follow us on Pinterest at @easyanddelish for more delish recipes.

Okay, so honestly your photo just made me drool a little. These look so crazy amazing! Perfect with coffee.
Thank you Heidi! Yes these cheese rolls are perfect with coffee and great for either breakfast or as a snack.
must they be served hot...would the cheese harden if served at room temperature?
Hi Karuna! These Brazilian cheese rolls must be served either hot or warm. The reason why it is because they are made with tapioca flour which can turn these rolls quite chewy once they cool. And yes, the cheese would also set a bit once it cools.