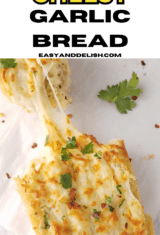
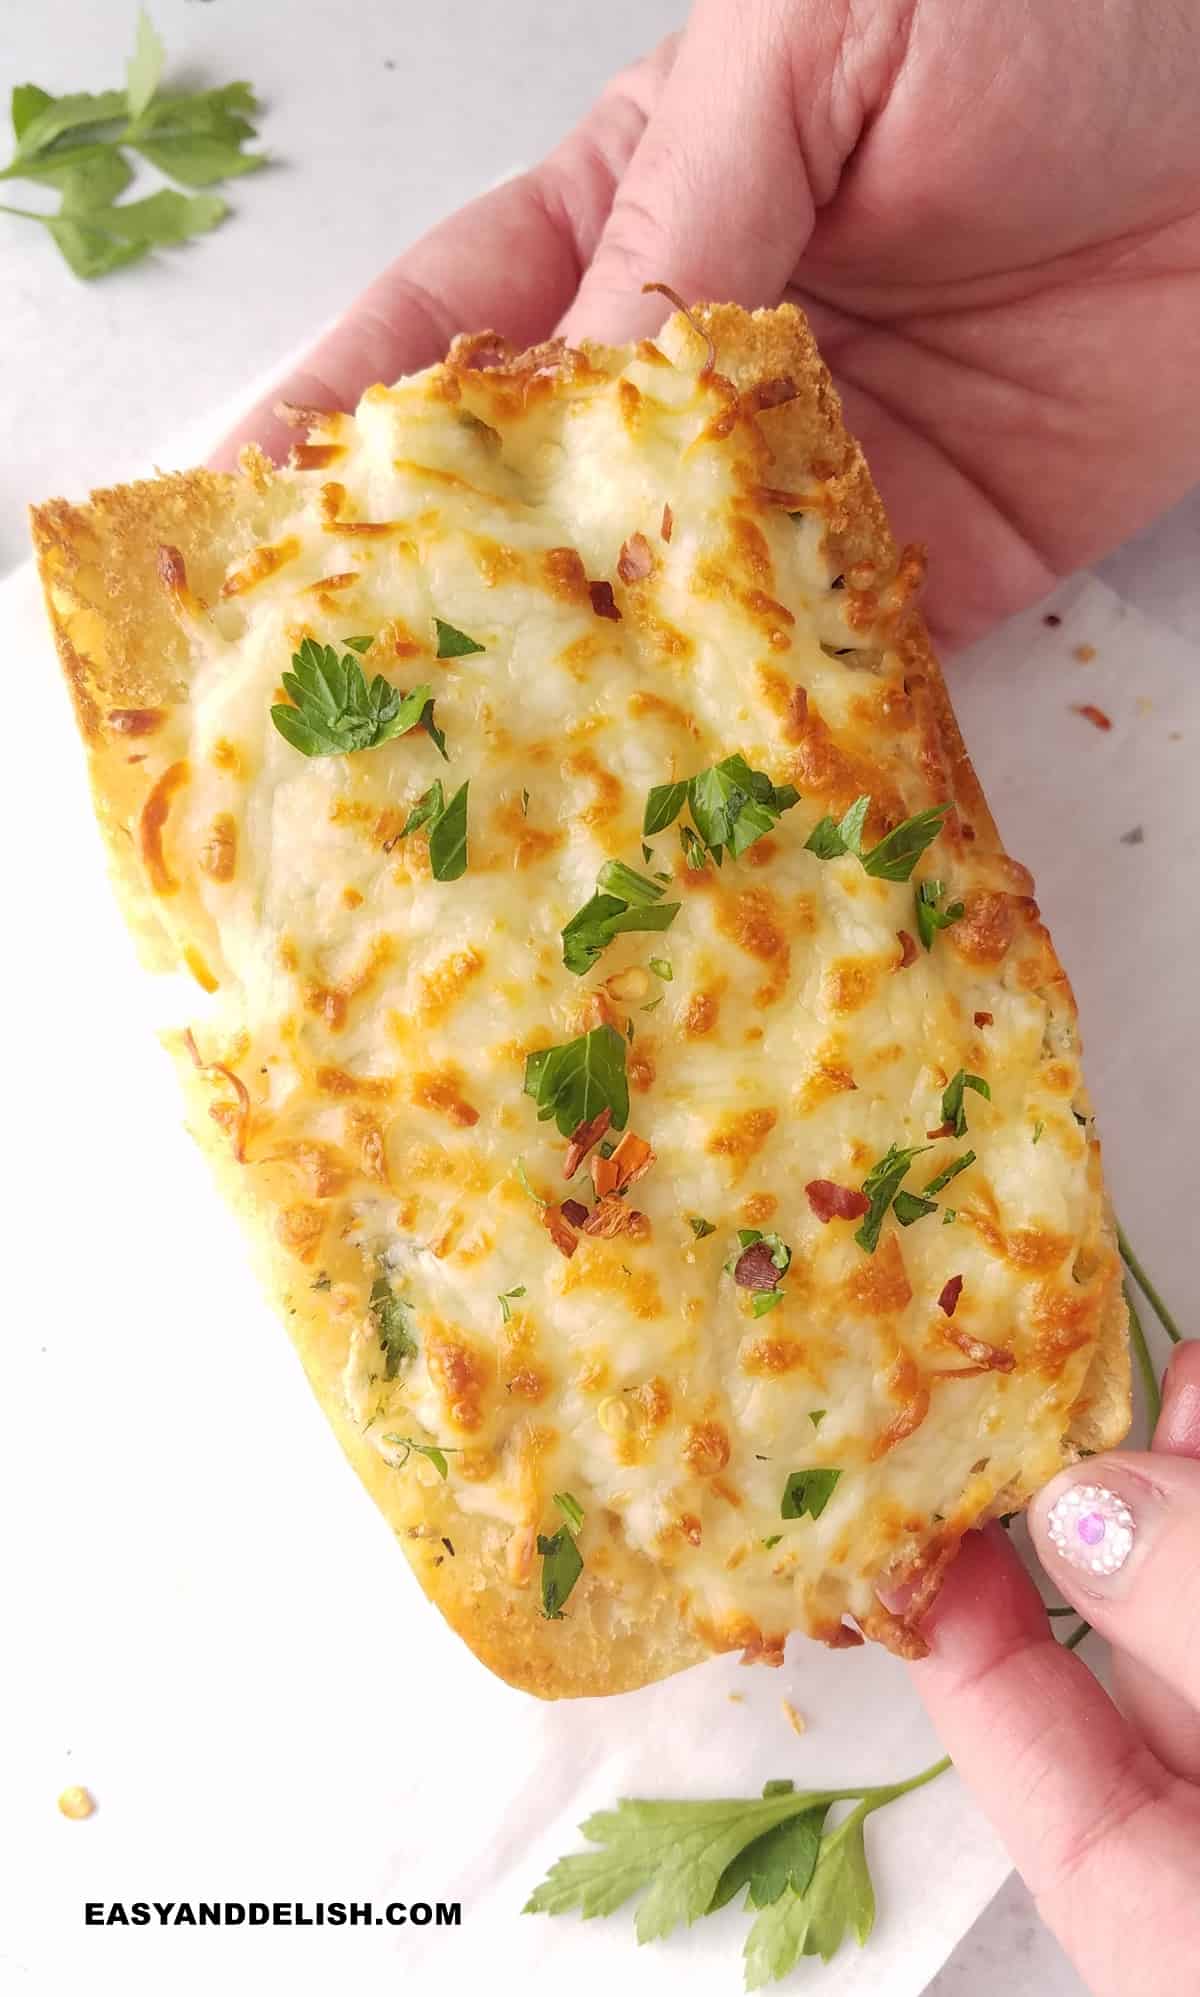
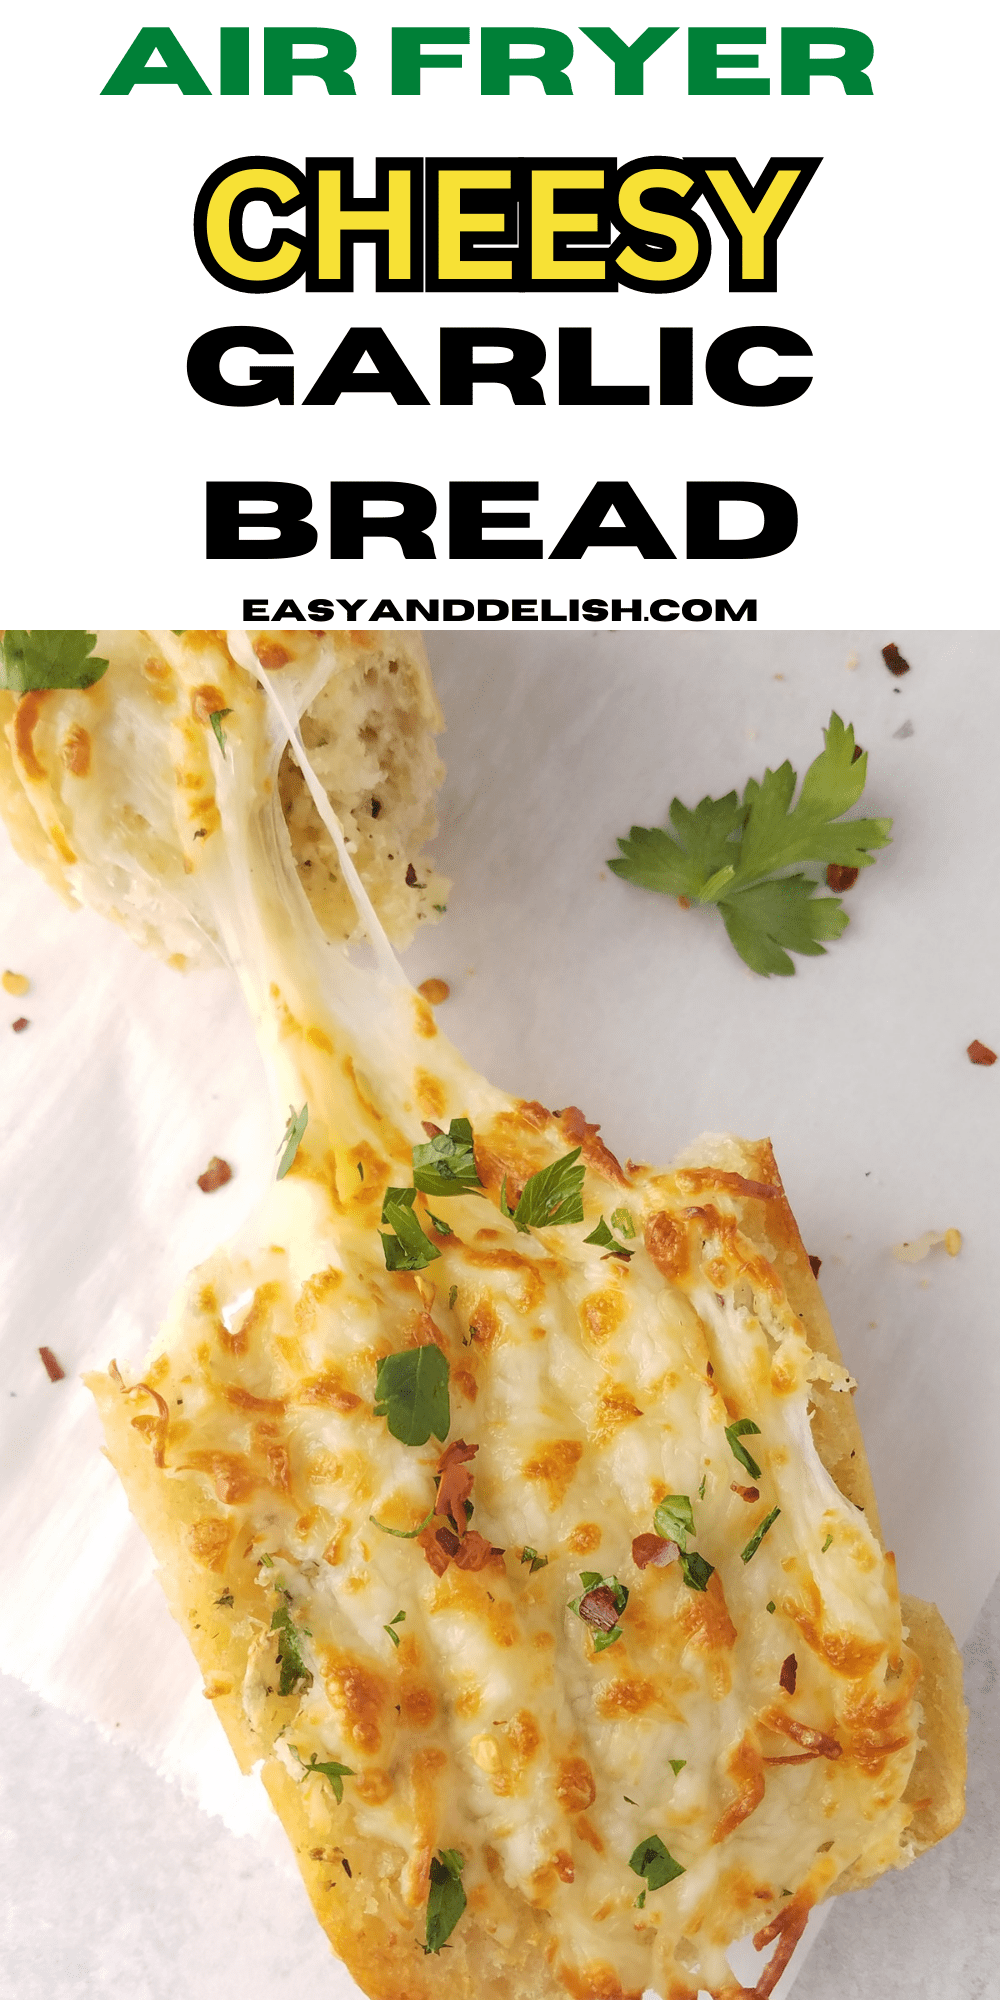
Air Fryer Garlic Bread makes a quick and easy snack or budget-friendly side for your soups, salads, pasta, and meats. It has a garlicky and buttery interior with a crispy and cheesy crust. So good!

Are you looking for a quick and easy snack or side dish that is also budget-friendly?
This air fryer garlic bread fits the bill!
It is crispy, cheesy, garlicky, and buttery -- able to satisfy the most demanding palates without much effort.
You will love this 15-minute simple recipe!
Table of Contents
- 1 Why you'll love this air fryer garlic bread recipe
- 2 Ingredients and Substitutions
- 3 Equipment
- 4 How to make air fryer garlic bread
- 5 Extra-Crispy Garlic Bread
- 6 Tips for making Garlic bread in air fryer
- 7 What to serve with Air Fried Garlic Bread
- 8 FAQ'S
- 9 How to Store
- 10 MORE AIR FRYER SIDE DISH RECIPES
- 11 Other bread recipes to enjoy
- 12 Air Fryer Garlic Bread
Why you'll love this air fryer garlic bread recipe
- Quick -- It takes about 15 minutes to put this recipe together and cook in the air fryer.
- Easy -- Our recipe call for less than 10 simple ingredients and all you have to do is to mix the garlic bread spread and smear it on top of the bread, then cook in the air fryer. Easy-peasy!
- Mess-free -- You'll need only a few tools to make this recipe, so not many things to wash afterward.
- Budget-friendly -- All the ingredients are easy to find in local grocery stores and quite affordable!
Ingredients and Substitutions
To make this garlic bread in the air fryer, you'll need:
- 1 baguette, cut into 5-6-inch slices -- It will yield about 8 slices (You can use French bread if you prefer)
For the Garlic bread spread:
- 4 tablespoon salted butter, at room temperature or softened
- 2 tablespoon extra-virgin olive oil (or simply olive oil)
- 2 tablespoon grated Parmesan cheese (or shredded Parmigiano-Reggiano cheese)
- 4 garlic cloves, minced (After mincing, add a pinch of salt on top and mash to turn it into a paste)
- 2 tablespoon chopped parsley (plus more for garnishing), or another Italian herb such as basil
- 1 teaspoon Italian seasoning
- ½ cup shredded mozzarella (plus more for topping), or another melting cheese of choice
Equipment
To make our easy garlic bread in air fryer, you will need the following:
- Air Fryer
- Tongs
- Cutting board
- Bread knife
- Medium bowl
- Fork
- Spoon
How to make air fryer garlic bread
1. Preheat your air fryer to 350 degrees F (180º C).
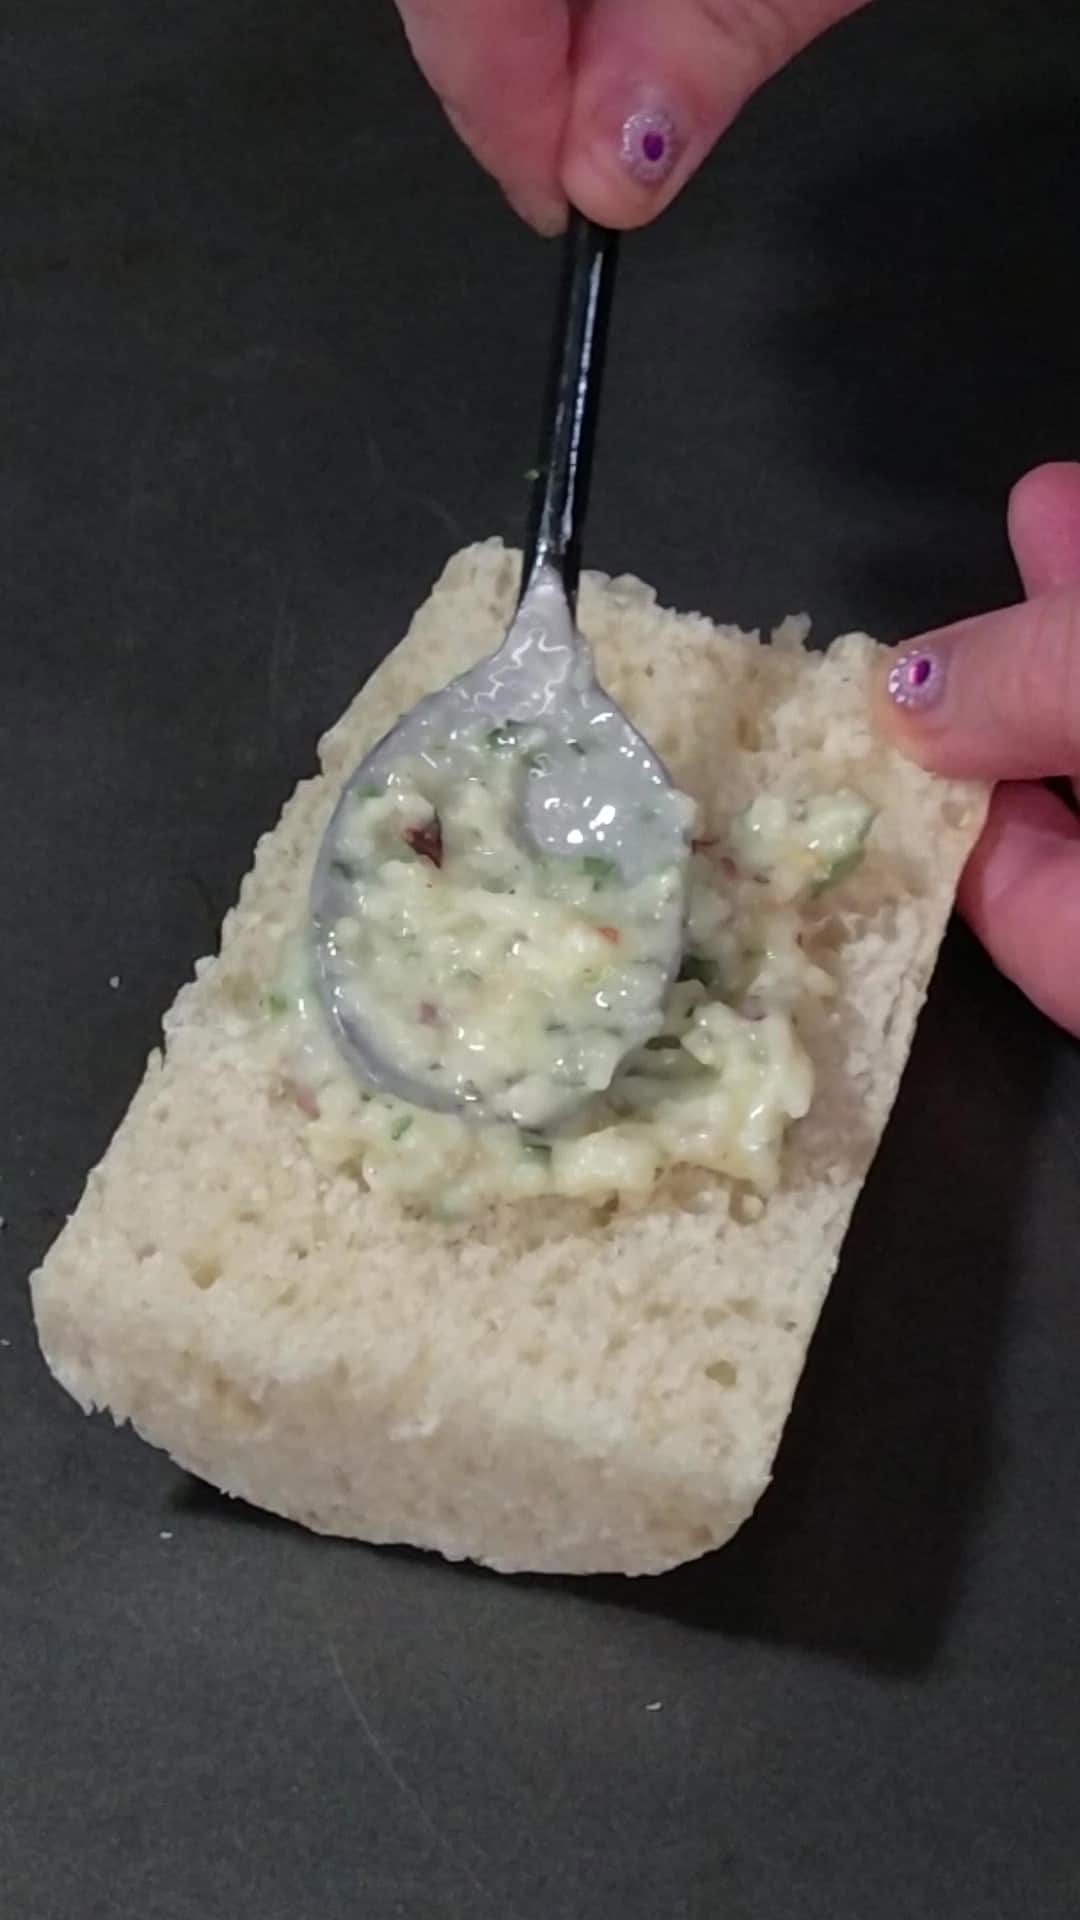
2. In a medium bowl, add the butter and smash with a fork. Then add and mix together all the other ingredients for the garlic bread spread until becoming spreadable.

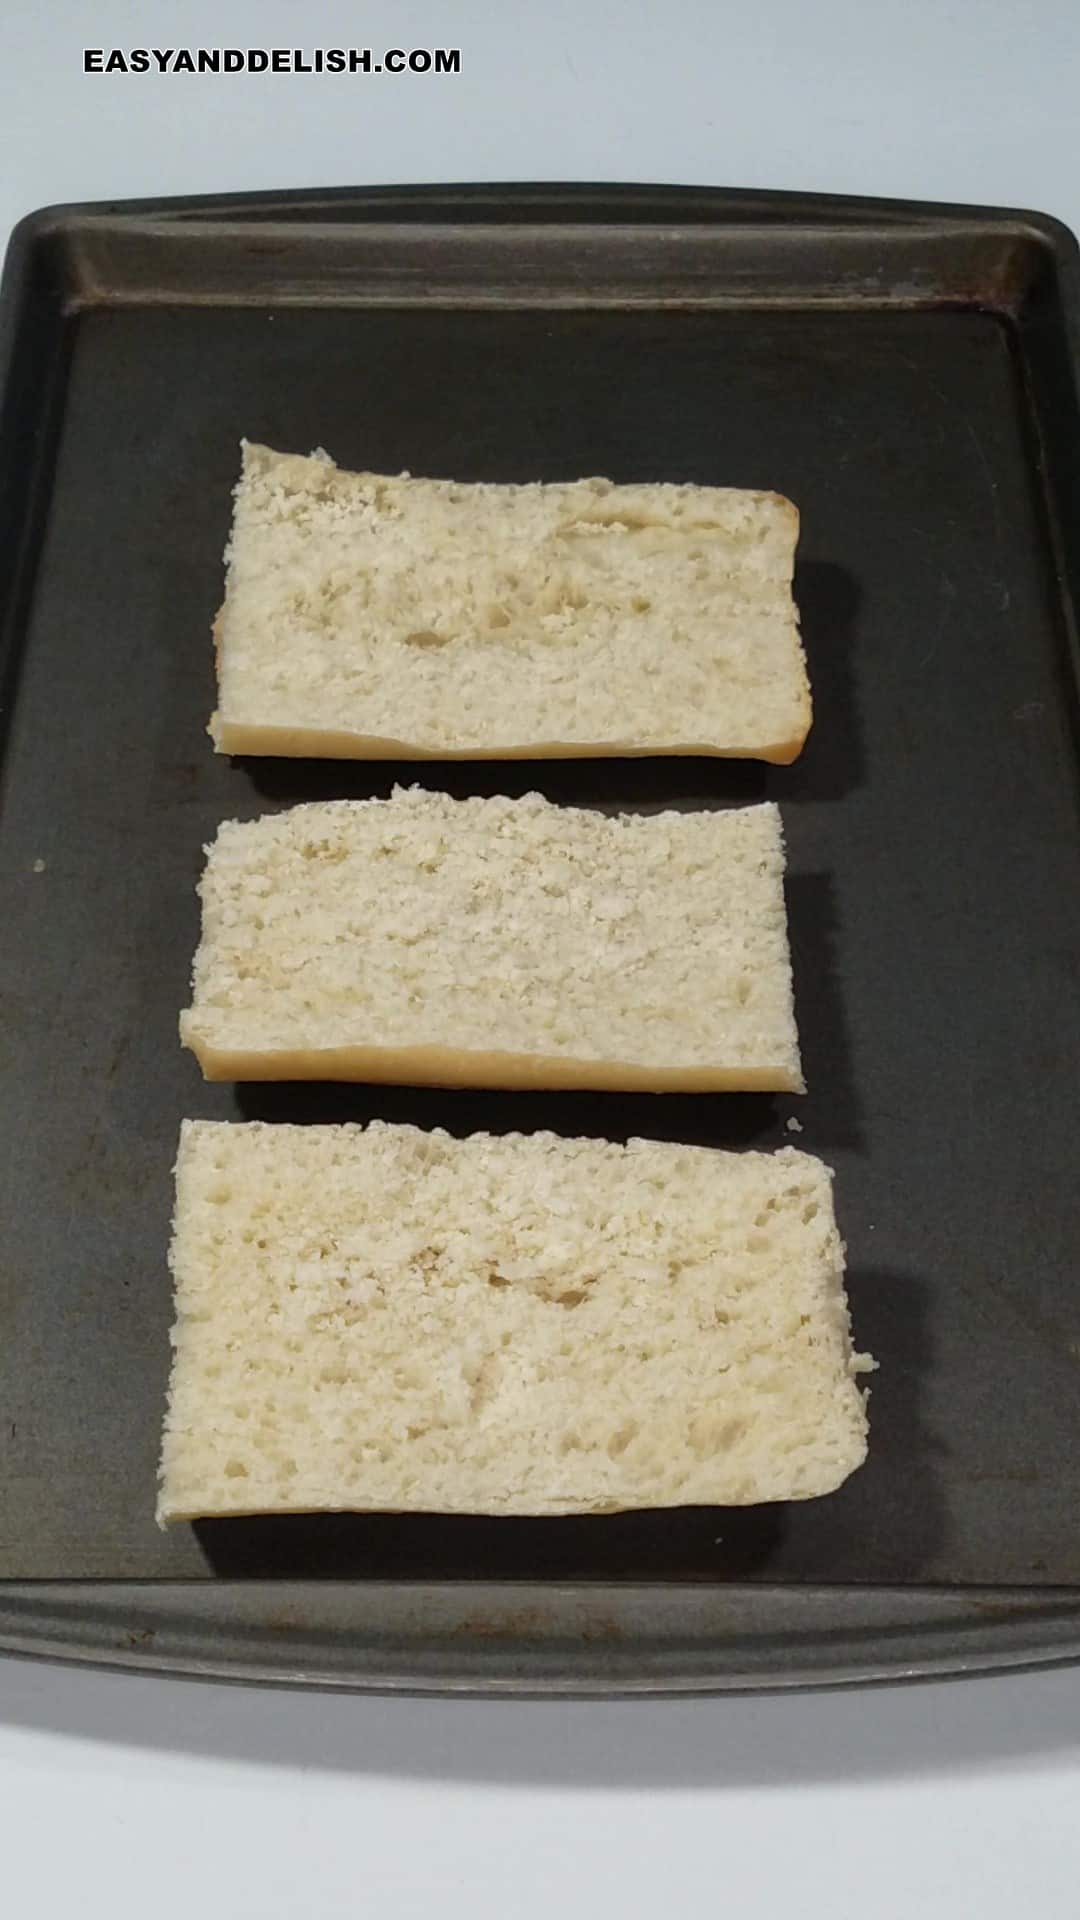
3. Slice the bread crosswise into 4 equal parts and then cut each in half lengthwise. Reserve!
4. Using a spoon, spread 1-2 tablespoon of the garlic spread on top of each slice of bread and then top with extra mozzarella cheese, about 2-4 tablespoon for each slice.
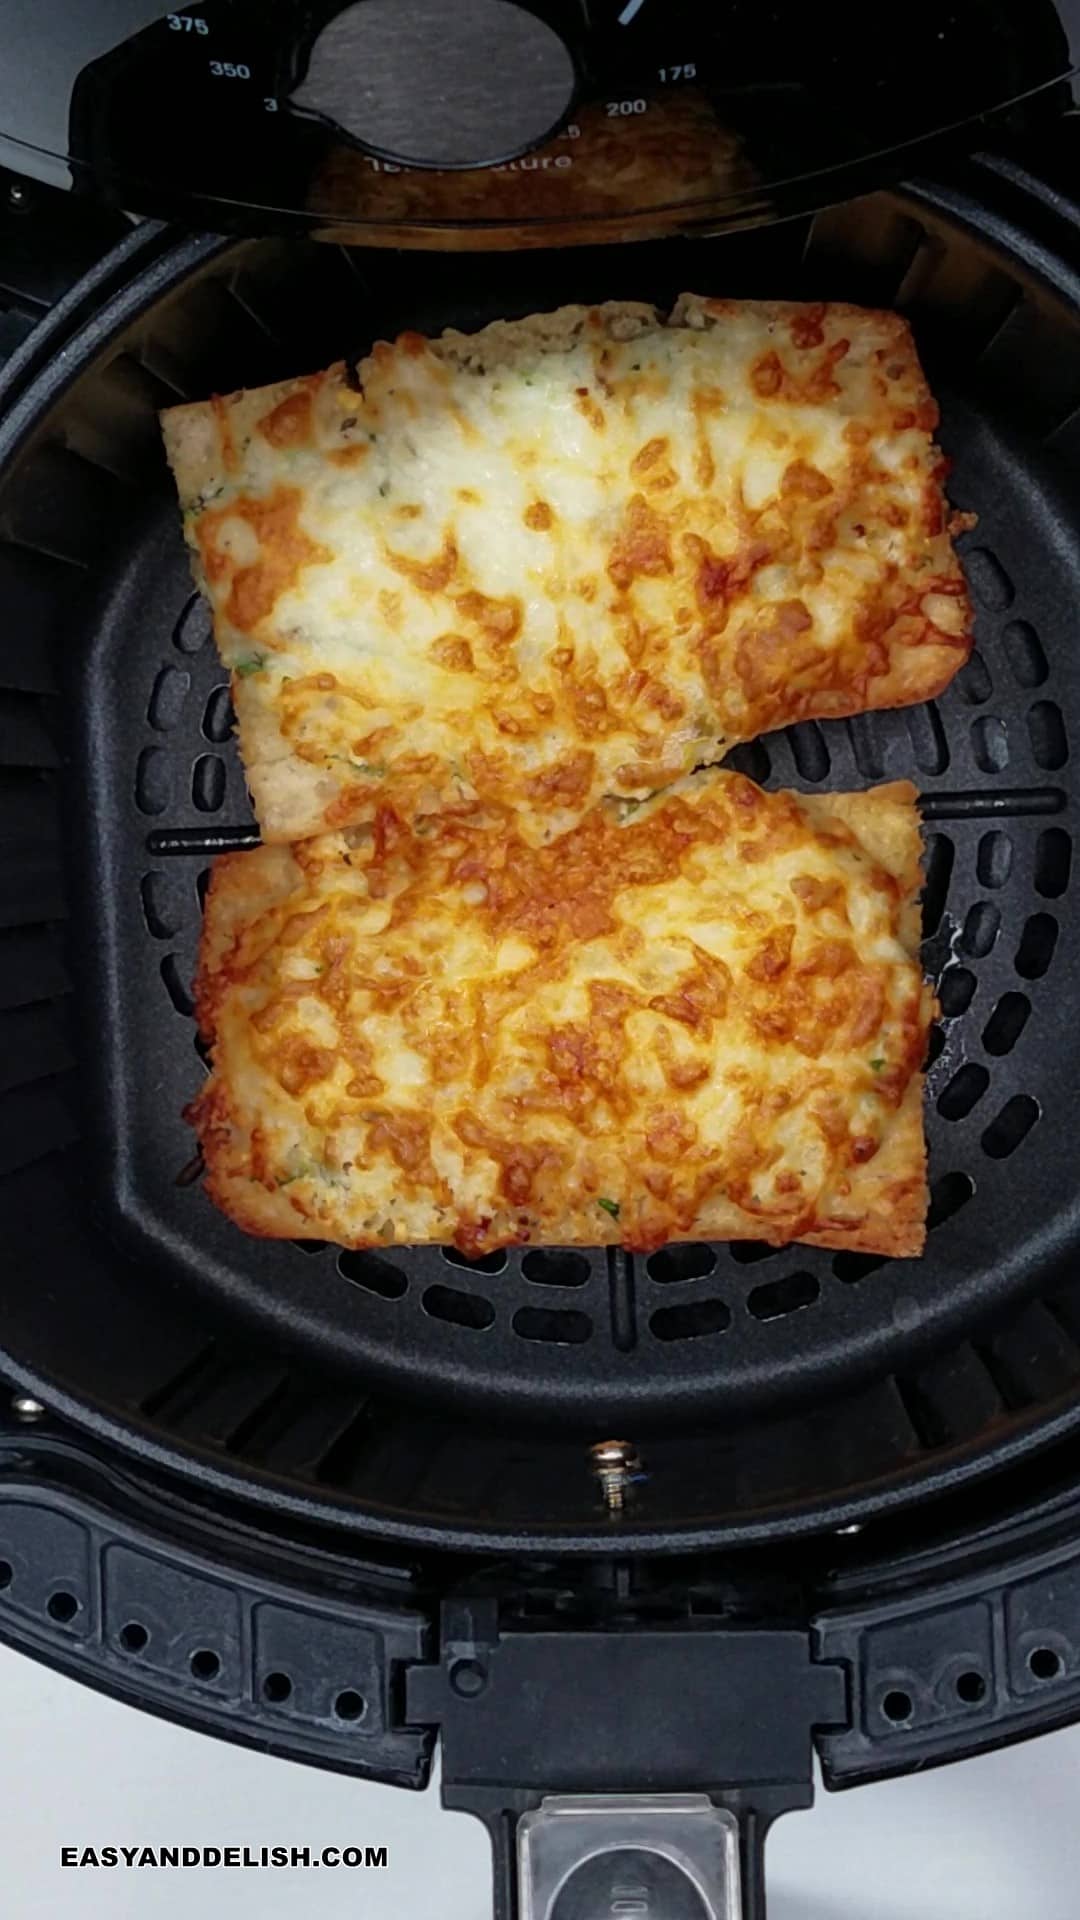
5. Depending on the size of your air fryer basket, carefully place 2 slices of bread into the basket in one single layer (without any overlapping). Cook for 5-6 minutes, or until becoming golden brown on top and crispy on the bottom.
6. Remove the bread from the basket using tongs and sprinkle extra chopped parsley on top. Serve while they are still hot.

Garlic bread in the oven:
- Preheat the oven to 400 degrees F (200 degrees C).
- Follow all the steps above and bake the garlic bread in the oven, on a baking sheet lined with parchment paper, for about 10-15 minutes or until crispy and golden brown.
Extra-Crispy Garlic Bread
If you enjoy extra-crispy garlic bread, place the bread with the garlic butter in the air fryer for 2 to 3 minutes, and then add cheese and air fry for 3-5 minutes, or until golden brown on top.
Tips for making Garlic bread in air fryer
- Adjust the time to how crispy you prefer your bread.
- Preheat your air fryer if your brand requires it! No need to grease the basket!
- Do not stack or overlap your garlic bread in the air fryer so it can toast evenly.
- Also, don't overcrowd the basket; otherwise,
- If freezing the bread, cook it straight from frozen either in the oven or air fryer.
- Check the bread a few times to make sure it doesn't burn!
- Cook time can vary with different air fryers.

What to serve with Air Fried Garlic Bread
For the best results, serve air-fried garlic bread right away, otherwise, it will harden as it cools.
You may serve as:
- A snack for coffee time, or an appetizer for casual occasions (cut smaller slices).
- A side for:
- Pasta dishes such as this Italian sausage pasta, Mediterranean pasta, shrimp scampi pasta, Gigi Hadid pasta, shrimp carbonara, or pasta bolognese.
- Salads such as white bean salad.
- Meats like our chicken Parmesan, air fryer steak, and meatballs.
- Soups such as this potato leek soup, sweet potato soup, ravioli soup, and chicken tortellini soup.
FAQ'S
Can I make it ahead?
Yes! You can prep ahead to save time, freeze, and then cook in the air fryer when you are ready to serve.
How to make vegan garlic bread in air fryer?
Just swap butter for vegan butter or olive oil, and skip the Parmesan and Mozzarella from the recipe.
What bread is best to use for Garlic Bread?
Some of the best bread to make garlic bread are French bread, baguette, and ciabatta because they have a hard crust or can easily develop one after being crisped up, but it depends on personal preferences for thickness and taste.
Do I need to brush the basket with olive oil?
No! This garlic bread won't stick to the basket unless a piece of cheese falls on it.
How to cook frozen garlic bread in air fryer?
We recommend cooking frozen garlic bread directly from frozen in a preheated air fryer at 340º F. It may take about 7-8 minutes, depending on your air fryer and how crispy you want your bread to be.
How to Store
- In the fridge: Store air fryer garlic bread leftovers in an airtight container in the fridge for 3-4 days. To reheat, air fry at 350º F for 2-3 minutes, or just until hot.
- To freeze (without the extra cheese on top), place it in a single layer on a baking sheet and freeze until hardened. Once frozen, transfer to an airtight container or sealable plastic bag and store in the freezer for up to 4 months.
- To reheat your frozen garlic bread directly from frozen, air fry at 340º F for about 4 minutes, then top with extra cheese and cook for additional 3-4 minutes or until golden brown on top.
MORE AIR FRYER SIDE DISH RECIPES
- Air fryer potato wedges
- Air fryer zucchini
- Brussels sprouts in air fryer
- Air fryer asparagus
- Air fryer broccolini
- Crispy smashed potatoes
Other bread recipes to enjoy
- Garlic Naan
- Popovers
- Brazilian cheese bread
- Crockpot soda bread
- Portuguese corn bread
- Easy sourdough bread recipe
- Garlic bread rolls
- Rosemary rye bread
PIN & ENJOY!

Air Fryer Garlic Bread
Equipment
- 1 tongs
- 1 cutting board
- 1 Bread knife
- 1 medium bowl
- 1 fork
- 1 spoon
Ingredients
- 1 baguette cut into 5-6-inch slices -- It will yield about 8 slices (You can use French bread if you prefer)
For the Garlic bread spread:
- 4 tablespoon salted butter at room temperature or softened
- 2 tablespoon extra-virgin olive oil or simply olive oil
- 2 tablespoon grated Parmesan cheese or shredded Parmigiano-Reggiano cheese
- 4 garlic cloves minced (After mincing, add a pinch of salt on top and mash to turn it into a paste)
- 2 tablespoon chopped parsley plus more for garnishing, or another Italian herb such as basil
- 1 teaspoon Italian seasoning
- ½ cup shredded mozzarella plus more for topping, or another melting cheese of choice
Instructions
- AIR FRYER METHOD: Preheat your air fryer to 350 degrees F (180º C).
- Slice the bread crosswise into 4 equal parts and then cut each in half lengthwise. Reserve!
- In a medium bowl, add the butter and smash with a fork. Then add and mix together all the other ingredients for the garlic bread spread until becoming spreadable.
- Using a spoon, spread 1-2 tablespoon of the garlic spread on top of each slice of bread and then top with extra mozzarella cheese, about 2-4 tablespoon for each slice.
- Depending on the size of your air fryer basket, carefully place 2 slices of bread into the basket in one single layer (without any overlapping). Cook for 5-6 minutes, or until becoming golden brown on top and crispy on the bottom.
- Remove the bread from the basket using tongs and sprinkle extra chopped parsley on top. Serve while they are still hot.
- OVEN METHOD: Preheat the oven to 400 degrees F (200 degrees C). Follow all the steps above and bake the garlic bread in the oven, on a baking sheet lined with parchment paper, for about 10-15 minutes or until crispy and golden brown.
Recipe Video

Recipe Notes
- In the fridge: Store air fryer garlic bread leftovers in an airtight container in the fridge for 3-4 days. To reheat, air fry at 350º F for 2-3 minutes, or just until hot.
- To freeze (without the extra cheese on top), place it in a single layer on a baking sheet and freeze until hardened. Once frozen, transfer to an airtight container or sealable plastic bag and store in the freezer for up to 4 months.
- To reheat your frozen garlic bread directly from frozen, air fry at 340º F for about 4 minutes, then top with extra cheese and cook for additional 3-4 minutes or until golden brown on top.
Nutrition
** Nutrition labels on easyanddelish.com are for educational purposes only. This info is provided as a courtesy and is only an estimate, since the nutrition content of recipes can vary based on ingredient brand or source, portion sizes, recipe changes/variations, and other factors. We suggest making your own calculations using your preferred calculator, based on which ingredients you use, or consulting with a registered dietitian to determine nutritional values more precisely.
Please note that health-focused and diet information provided on easyanddelish.com is for educational purposes and does not constitute medical advice, nor is it intended to diagnose, treat, cure, or prevent disease. Consult with your doctor or other qualified health professional prior to initiating any significant change in your diet or exercise regimen, or for any other issue necessitating medical advice.

Leave a Reply